
Think you need a barbell and a garage gym to get strong?
That’s wrong.
A single dumbbell, a band, or even your bodyweight can build real, measurable strength if you follow a clear plan and honestly track progress.
This post shows a simple, week-to-week progression for home training with minimal gear.
You’ll get movement tiers, exact ways to make exercises harder (leverage, tempo, volume), and a realistic “do this tonight” option.
No fluff—just the steps that actually work so you keep getting stronger.
Why Minimal Equipment Works for Real Strength Gains

You don’t need a garage full of iron to build real strength. A single pair of dumbbells, a resistance band, or even your bodyweight can drive measurable progress when you apply a structured plan and track your sessions honestly.
Most beginners think strength training requires a rack, barbell, bench, and specialty machines. That assumption keeps thousands of people stuck in analysis paralysis, waiting for the perfect setup before starting. The truth is simpler: resistance is resistance. Your muscles respond to tension, time under load, and progressive challenge, not to the brand name stamped on the weight.
Research consistently shows that load magnitude matters less than effort and consistency for beginners. A 2015 meta-analysis in the Journal of Strength and Conditioning Research found that lighter loads (30 to 50% of one-rep max) produced similar muscle growth to heavier loads when sets were taken close to failure and volume was equated. For a beginner working at home, that means a single 20 pound dumbbell or a medium resistance band can deliver the same hypertrophy stimulus as a loaded barbell, as long as you push each set hard enough and add reps or resistance over time.
Minimal equipment also reduces decision fatigue. You’re not scrolling through fifty machine options or worrying about gym etiquette. You pick four to six movements, perform them in a repeatable sequence, and track one simple progression variable each week. That clarity builds the habit loop faster than complexity ever will.
Home training with limited gear also teaches you to manipulate leverage, tempo, and stability. Skills that transfer directly to any future training environment. Learning to make a pushup harder by elevating your feet or slowing the descent builds body awareness and control that a chest press machine never will.
The key constraint is honest effort. Minimal equipment magnifies the importance of training close to technical failure, because you can’t simply add another plate to the bar. You must earn each new rep, each slower tempo, each longer hold. That constraint becomes your greatest teacher.
The Core Movement Framework: Push, Pull, Hinge, Squat, Carry, Core

Every effective strength program, whether in a commercial gym or a living room, is built on six fundamental movement patterns. Master these patterns with minimal equipment and you cover every major muscle group, joint action, and functional demand your body needs.
Push movements train your chest, shoulders, and triceps by moving a load away from your torso. At home, that means pushups (floor, incline, decline, tempo variations), overhead presses with a single dumbbell or band, and floor dumbbell presses if you have a pair of weights. Pushes build pressing strength for daily tasks like lifting a box overhead or pushing a stroller uphill.
Pull movements target your back, biceps, and rear delts by drawing resistance toward your body. Minimal equipment pulls include inverted rows under a sturdy table, band rows anchored to a door or post, one arm dumbbell rows, and towel rows if you lack a band. Pulling balances pushing work and protects shoulder health by strengthening the muscles that retract and depress your scapulae.
Hinge movements load your hamstrings, glutes, and lower back through hip extension. The simplest home hinge is the glute bridge or single leg hip thrust. Add a dumbbell or kettlebell and you unlock Romanian deadlifts and kettlebell swings, two of the highest value posterior chain builders available. Hinging teaches you to move from your hips instead of your lower back, a skill that prevents injury during real life bending and lifting.
Squat movements develop your quads, glutes, and core by lowering and raising your center of mass. Bodyweight squats, goblet squats with one weight held at your chest, and split squats (including Bulgarian variations with your rear foot elevated) all fit this pattern. Squatting builds leg strength, ankle and hip mobility, and the postural control needed for walking, climbing stairs, and getting up from the floor as you age.
Carry movements challenge your grip, core stability, and total body tension by forcing you to hold and move a load. Farmer’s carries with a dumbbell in each hand, suitcase carries with one weight to resist lateral bending, and plank drags (dragging a weight across the floor while holding a plank) all train anti-rotation and anti-flexion strength. Carries are underrated for home training because they require minimal space, zero technical skill, and deliver rapid grip and core gains.
Core movements stabilize your spine and transfer force between your upper and lower body. Planks (front, side, single arm), dead bugs, bird dogs, pallof presses with a band, and ab rollouts (if you have a wheel or Swiss ball) all belong here. Strong core work protects your lower back, improves your performance in every other pattern, and builds the midline tension that makes pushups, squats, and carries feel solid instead of wobbly.
A balanced weekly program hits each pattern at least once. You don’t need to train all six in every session. A simple full body workout might pair a push with a pull, a hinge with a squat, and finish with a short carry or core drill. That structure keeps no muscle group or movement quality neglected over time.
What You Actually Need: Equipment Tiers and Smart Substitutions
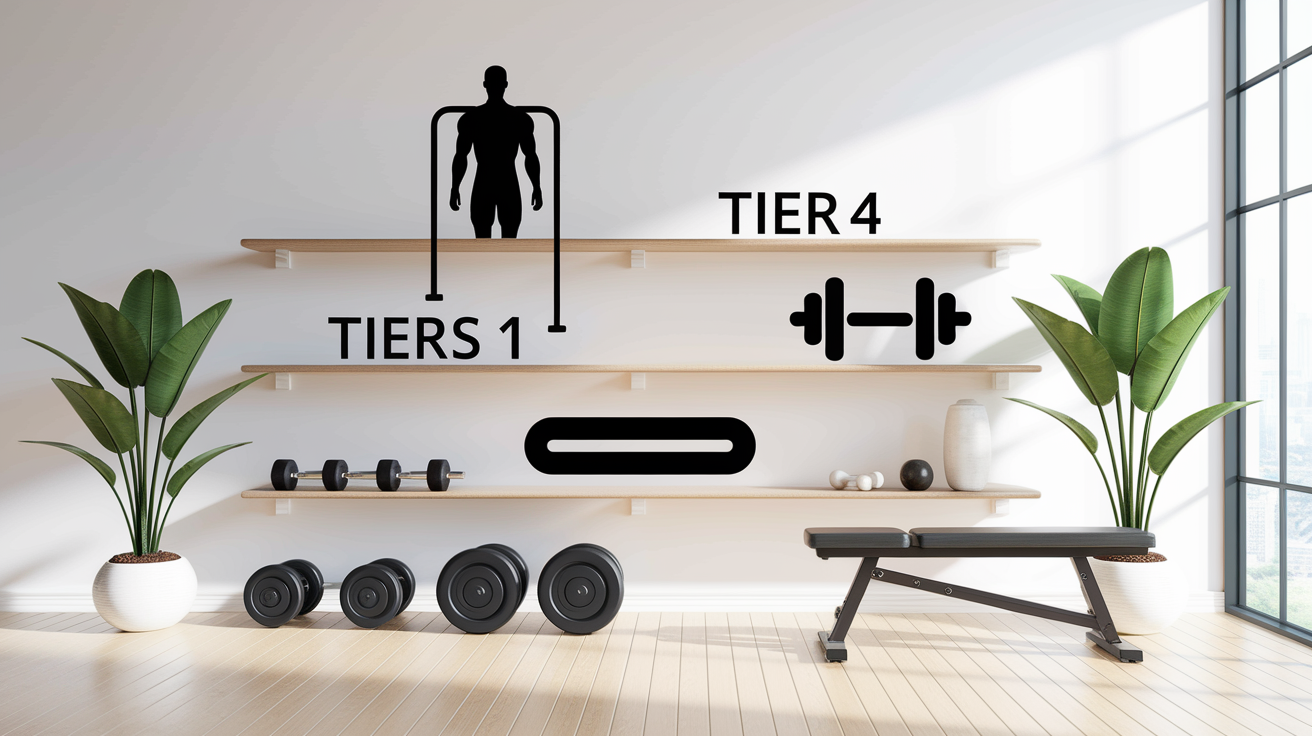
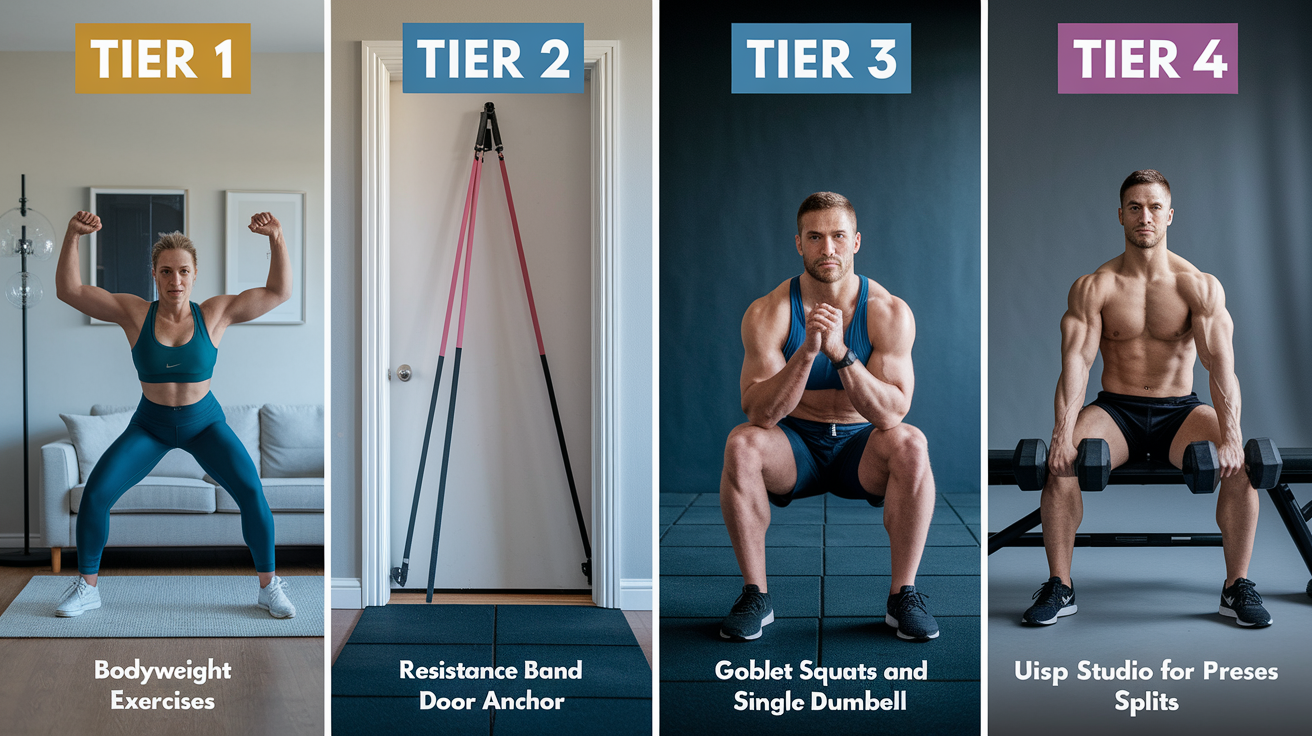
Home strength training scales cleanly across four equipment tiers. Each tier unlocks new exercise options and progression levers, but none requires a big investment or dedicated training space.
Tier 1: Bodyweight only. You need a clear floor space roughly six feet by three feet, a sturdy wall, and a stable elevated surface like a countertop or bench for incline pushups and step ups. Bodyweight alone covers pushups (incline to floor to decline), squats, lunges, split squats, glute bridges, planks, side planks, inverted rows under a table, and dynamic cardio drills like mountain climbers or jump squats. This tier is free, portable, and sufficient for 8 to 12 weeks of measurable strength gains if you apply tempo, leverage, and effort intelligently.
Tier 2: Resistance bands. A set of looped resistance bands or a single handled band with door anchor costs $15 to $30 and adds horizontal and vertical pulling (rows, pull aparts, face pulls, banded pull up assistance), pressing variations, and adjustable resistance for squats and hinges. Bands are lightweight, packable, and joint friendly because tension increases through the range of motion. They also teach you to maintain constant tension, a skill that improves muscle engagement in every lift. Keep bands away from sharp edges and check for tears before each session.
Tier 3: One dumbbell or kettlebell. A single adjustable dumbbell or a fixed 20 to 40 pound kettlebell opens goblet squats, Romanian deadlifts, kettlebell swings, one arm rows, one arm overhead presses, farmer’s carries, and offset exercises like suitcase carries and off set lunges. One weight forces unilateral and core stabilizing work, which builds balance and prevents left right strength imbalances. Cost ranges from $30 for a basic kettlebell to $200 for a quality adjustable dumbbell that scales from 5 to 50 pounds per hand.
Tier 4: A pair of weights plus a bench or stable elevated surface. Two dumbbells or kettlebells and a flat workout bench (or a sturdy coffee table, ottoman, or stair) give you bilateral presses (floor press, incline press, overhead press), split squats with rear foot elevated (Bulgarian split squats), step ups, two arm rows, and traditional dumbbell exercises familiar from any commercial gym program. This tier costs $100 to $400 depending on weight range and bench quality, but it replicates 80% of a full gym’s exercise library.
Smart substitutions when you’re missing a piece. No bench? Use your couch, a sturdy chair, or the edge of your bed for incline presses and step ups. No pull up bar? Loop a towel around a door handle or post and perform towel rows, or use a resistance band for all pulling work. No weights at all? Fill a backpack with books or water jugs and use it for squats, rows, and carries. The goal isn’t perfection. It’s consistent application of progressive tension to your muscles.
Most beginners should start at Tier 1 or Tier 2 and add equipment only when bodyweight progressions stall or when they can perform 15 to 20 reps of an exercise with perfect form and no longer feel challenged. Buying too much gear up front creates clutter and decision fatigue. Start simple, master the movements, then upgrade one tier at a time as your strength demands it.
How to Progress Without Adding Weight: Leverage, Tempo, and Volume

Progressive overload is the single non-negotiable principle of strength training. Your muscles adapt to a given stress, so you must increase that stress over time to keep improving. In a commercial gym, most people add weight to the bar. At home with fixed or minimal equipment, you manipulate leverage, tempo, and volume instead.
Leverage progressions change your body position to increase or decrease the percentage of bodyweight you’re lifting. A wall pushup at chest height loads roughly 20% of your bodyweight onto your arms. Move to a countertop (waist height) and you’re pressing about 40%. Drop to the floor and you’re pushing 60 to 70%. Elevate your feet on a chair and you exceed bodyweight. Each position change delivers a measurable jump in difficulty without adding a single pound of external load.
For squats, start with bodyweight, progress to goblet squats holding a light weight at your chest, then shift to split squats or Bulgarian split squats where one leg does most of the work. Single leg squats (pistol progressions) or shrimp squats load one leg with your entire bodyweight, a challenge equivalent to squatting double your bodyweight on two legs.
For rows, lie more horizontal under your table to increase difficulty, or elevate your feet. For planks, move from wall to knees to floor to feet elevated to single arm variations. Every pattern has a leverage ladder you can climb for months before needing external load.
Tempo manipulation adds time under tension without changing load. A standard pushup might take two seconds total (one second down, one second up). Slow the lowering phase to three or four seconds and you triple the eccentric workload, the portion of the lift most responsible for muscle damage and growth. Add a one or two second pause at the bottom and you eliminate the stretch reflex, forcing your muscles to produce force from a dead stop.
A simple tempo prescription looks like this: “3-1-1-0.” That’s three seconds lowering, one second pause, one second lifting, zero seconds rest at the top. Apply that tempo to any exercise and the difficulty doubles even though the weight stays the same. Track tempo in your training log just like reps and sets.
Tempo work also teaches you perfect form. If you can’t control a three second descent, your stabilizers aren’t strong enough yet and you’re likely compensating with momentum. Slowing down exposes and fixes those weaknesses.
Volume increases mean more sets, more reps, or shorter rest periods. If you’re performing three sets of ten pushups with 90 seconds rest, you can progress by adding one rep per set each week until you hit three sets of fifteen. Or keep reps constant and add a fourth set. Or reduce rest to 60 seconds, which increases metabolic stress and cardiovascular demand.
For beginners, adding reps is usually the simplest and safest progression. Once you can perform 15 to 20 reps of an exercise with good form, shift to a harder variation (better leverage or slower tempo) and drop back to 8 to 10 reps to keep the challenge high.
Combine these three levers and you unlock years of progression. Start with an incline pushup, 3 sets of 8 reps at normal speed. Add one rep per set each week. When you hit 3 sets of 15, move to floor pushups at 3 sets of 8. Add reps. When you hit 3 sets of 15, apply a 3-1-1-0 tempo at 3 sets of 8. Add reps. When you hit 3 sets of 12 at that tempo, elevate your feet and start again. That’s a 12 to 24 month progression roadmap from a single movement pattern.
Sample Full Body Workouts by Equipment Tier
These three workouts are plug and play templates matched to your available gear. Each session trains all six movement patterns in 25 to 40 minutes. Perform each workout two to four times per week on non-consecutive days, with at least 48 hours between sessions that train the same muscle groups.
Tier 1: Bodyweight Only (Total time: 25 to 30 minutes)
Warm up (5 minutes): March in place for 60 seconds, arm circles forward and back (10 each direction), hip rotations (10 each direction), bodyweight squats (10 reps), incline pushups on countertop (8 reps).
Circuit A (Push and Pull):
- Incline pushups (countertop or bench): 3 sets × 8 to 12 reps, rest 60 seconds
- Inverted rows under table (feet on floor, body angled 45 degrees): 3 sets × 8 to 12 reps, rest 60 seconds
Circuit B (Squat and Hinge):
- Bodyweight squats: 3 sets × 12 to 15 reps, rest 60 seconds
- Glute bridges: 3 sets × 12 to 15 reps, rest 60 seconds
Circuit C (Core and Carry):
- Front plank: 3 sets × 20 to 30 seconds, rest 45 seconds
- Side plank (each side): 2 sets × 15 to 20 seconds per side, rest 45 seconds
Progression rules: Add 1 to 2 reps per set each week. When you reach the top of the rep range, increase leverage (move pushups from counter to floor, add a pause at the bottom, elevate feet) or apply a slower tempo (3 second lowering phase).
Tier 2: Resistance Band + Bodyweight (Total time: 30 to 35 minutes)
Warm up (5 minutes): March in place, arm circles, hip rotations, 8 bodyweight squats, 8 band pull aparts.
Circuit A (Push and Pull):
- Floor pushups (or incline if needed): 3 sets × 8 to 12 reps, rest 60 seconds
- Band rows (anchor band at chest height, pull to ribs): 3 sets × 12 to 15 reps, rest 60 seconds
Circuit B (Squat and Hinge):
- Banded goblet squat (loop band under feet, hold handles at chest): 3 sets × 10 to 12 reps, rest 60 seconds
- Single leg glute bridge or hip thrust: 3 sets × 10 to 12 reps per leg, rest 60 seconds
Circuit C (Pull and Core):
- Band face pulls (anchor band high, pull to forehead): 2 sets × 15 to 20 reps, rest 45 seconds
- Dead bugs: 3 sets × 8 to 10 reps per side, rest 45 seconds
Progression rules: Increase band resistance (thicker band or double loop), add reps, or shorten rest. When 15+ reps feel easy, switch to a harder band or add a pause at peak contraction.
Tier 3: One Dumbbell or Kettlebell + Bodyweight (Total time: 35 to 40 minutes)
Warm up (5 minutes): March in place, arm circles, hip rotations, 8 goblet squats (light or bodyweight), 8 pushups.
Circuit A (Squat and Hinge):
- Goblet squat (hold weight at chest): 3 sets × 8 to 12 reps, rest 60 to 90 seconds
- Kettlebell swings (or dumbbell Romanian deadlift if swings are unfamiliar): 3 sets × 10 to 15 reps, rest 60 to 90 seconds
Circuit B (Push and Pull):
- Pushups (floor, feet elevated, or tempo variation): 3 sets × 8 to 12 reps, rest 60 seconds
- One arm dumbbell row (supported on bench or countertop): 3 sets × 8 to 12 reps per arm, rest 60 seconds
Circuit C (Carry and Core):
- Farmer’s carry or suitcase carry (walk 30 to 40 seconds per side): 3 rounds, rest 60 seconds
- Front plank with shoulder taps: 3 sets × 8 to 10 taps per side, rest 45 seconds
Progression rules: Add weight when you can complete all sets at the top of the rep range with 1 to 2 reps left in reserve. If you can’t add weight, slow the tempo (3 second eccentric) or add reps. For carries, increase hold time or walk distance before adding load.
All three workouts follow the same structure: warm up for 5 minutes, train 3 to 4 movement pairs or circuits, finish in 25 to 40 minutes. Track one variable each week (reps, load, tempo, rest interval). Repeat the same workout for 4 to 6 weeks before swapping one or two exercises. Consistency and small weekly improvements beat random variety every time.
Practical Progression Tracking: The One Variable Per Week Rule

Most beginners fail to progress because they change too many things at once or track nothing at all. The one variable per week rule solves both problems.
Each week, pick one progression variable to improve across your workouts and leave the others constant. That variable might be total reps, load, tempo, rest interval, or leverage. Changing one thing makes progress measurable and keeps your training focused.
Week by week example using pushups:
- Week 1 baseline: Floor pushups, 3 sets × 8 reps, normal speed, 90 seconds rest.
- Week 2: Add one rep per set → 3 sets × 9 reps, same rest.
- Week 3: Add one more rep → 3 sets × 10 reps, same rest.
- Week 4: Reduce rest → 3 sets × 10 reps, 60 seconds rest.
- Week 5: Add tempo → 3 sets × 8 reps at 3-1-1-0 tempo, 60 seconds rest.
- Week 6: Add reps at new tempo → 3 sets × 9 reps at 3-1-1-0, 60 seconds rest.
After six weeks you’ve added reps, cut rest by a third, and introduced eccentric control. All from a single exercise without adding equipment. That’s measurable, repeatable progress.
Keep a simple training log. A notes app on your phone works fine. Write the date, exercise name, sets, reps, load (if any), tempo, and rest. Add a short note about how the session felt (“reps felt easy, ready to progress next week” or “form broke on last set, repeat this week”). That log becomes your roadmap. When progress stalls, you flip back two weeks and see exactly what worked.
Use the “2-for-2” rule as a decision gate for adding load or difficulty. If you can perform two or more extra reps beyond your target on the last set for two consecutive workouts, it’s time to increase the challenge. For bodyweight work, that means changing leverage or tempo. For weighted exercises, add the smallest increment you have (usually 2.5 to 5 pounds per dumbbell) and drop reps back to the bottom of your range.
Track effort using the RIR (reps in reserve) scale. After each set, estimate how many more reps you could have done with perfect form. For strength work, aim to finish most sets with 1 to 3 RIR. For muscle building sets, 0 to 2 RIR. If you finish with 5+ RIR, the set was too easy and won’t drive adaptation. If form breaks or you hit true failure, you pushed too hard and increased injury risk.
Tracking one variable per week also prevents the common mistake of adding reps and weight and sets all at once. That triple jump in volume or intensity usually leads to soreness, fatigue, or missed workouts. Small, consistent weekly nudges compound into major strength gains over months. Patience and specificity beat aggression every time.
Common Plateaus and How to Break Them

Every beginner hits a point where progress stalls. You add reps or seconds but can’t complete the target. The weight that felt manageable last month now feels stuck. That plateau is normal and usually signals one of four fixable problems.
Problem 1: You’re not training close enough to failure. Many beginners stop sets when they feel uncomfortable, not when their muscles are genuinely tired. If you finish a set and feel like you could have done five more reps, you didn’t create enough stimulus to force adaptation. Solution: on your final set of each exercise, push until you have only 1 or 2 perfect reps left in the tank. Learn what “close to failure” feels like, then apply that effort to all your work sets.
Problem 2: You’re not recovering between sessions. Strength improves during rest, not during the workout. If you train the same muscles on back to back days or sleep fewer than seven hours most nights, your body can’t repair and build new tissue. Solution: space same muscle group sessions 48 hours apart, aim for 7 to 9 hours of sleep per night, and eat enough protein (roughly 0.7 to 1 gram per pound of bodyweight daily). If life disrupts sleep or nutrition for a week, expect your lifts to stall temporarily and resume normal progress when recovery improves.
Problem 3: You’ve outgrown the current exercise variation. If you can perform 20+ reps of an exercise with good form, adding more reps becomes cardio endurance training, not strength work. Solution: increase difficulty by changing leverage (incline pushups to floor to decline), adding tempo (3 second eccentrics), or switching to a unilateral variation (single leg squat, one arm row). Drop reps back to 8 to 10 and rebuild from there.
Problem 4: You’re doing the same workout for too long without variety. The body adapts quickly to a repeated stimulus. After 6 to 8 weeks, even a well designed program loses effectiveness. Solution: every 4 to 6 weeks, swap one or two exercises for similar movements (replace goblet squats with Bulgarian split squats, swap floor pushups for decline pushups), change your rep range (switch from 3 sets of 10 to 4 sets of 6 with longer rest), or rearrange your session order (train pull before push instead of after). These small changes re-stimulate adaptation without abandoning the core movement patterns.
Specific plateau busting tactics:
- Eccentric only sets: Perform only the lowering phase of a movement (3 to 5 seconds down) for 3 to 5 reps per set. Eccentrics generate high muscle damage and strength even when you can’t complete a full rep. For example, if you can’t do a full pullup, jump to the top and lower yourself slowly. After 2 to 4 weeks, your concentric (lifting) strength will catch up.
- Cluster sets: Break one hard set into smaller chunks with short rest. Instead of 10 pushups in one set, do 4 reps, rest 15 seconds, do 3 reps, rest 15 seconds, do 3 reps. You complete more total reps at higher quality, which builds volume and confidence.
- Increase training frequency: If you train a movement once per week and stall, try twice per week at lower volume per session. For example, instead of 4 sets of pushups on Monday, do 2 sets Monday and 2 sets Thursday. The extra practice often breaks the plateau faster than grinding harder once a week.
- Reduce other life stress: Training is one stressor among many. If work, sleep, or personal life stress spikes, your body prioritizes survival over muscle growth. You can’t out-train chronic stress. When life gets heavy, maintain your workout frequency but dial back intensity (leave 3 to 4 RIR instead of 1 to 2) until stress normalizes.
Plateaus are feedback, not failure. They tell you it’s time to adjust effort, recovery, exercise selection, or volume. Apply one change at a time, track the result for two weeks, and adjust again if needed. Most plateaus break within two to four weeks when you address the real cause instead of just pushing harder.
Weekly Scheduling: Full Body vs. Split Routines for Busy Life

How you distribute your training across the week matters as much as what you do in each session. For beginners training at home with minimal equipment, two scheduling models work best: full body routines and simple upper/lower splits.
Full body routines train all major movement patterns (push, pull, squat, hinge, core) in every session, two to four times per week. This approach maximizes frequency, meaning each muscle group gets stimulated multiple times per week, which accelerates learning and strength gains for beginners. Recovery is straightforward: take at least one full rest day between sessions. A typical week might look like Monday and Thursday for strength, Saturday for a lighter conditioning session or long walk.
Full body sessions work well when you have 30 to 45 minutes two to three times per week and want simplicity. You don’t need to remember which body part you trained yesterday. Every session is the same structure: pick one squat or hinge, one push, one pull, one core or carry movement. Perform 3 to 4 sets of each, 8 to 12 reps, 60 to 90 seconds rest. Total exercises: 4 to 6. Total time: 25 to 40 minutes including warm up.
Example full body session:
- Goblet squat: 3 × 10
- Floor pushup: 3 × 10
- Band row: 3 × 12
- Glute bridge: 3 × 12
- Front plank: 3 × 30 seconds
Repeat that structure two to four times per week, changing one variable per week (reps, tempo, rest, exercise variation). After 4 to 6 weeks, swap one or two movements to keep adaptation fresh.
Upper/lower splits divide your training into upper body days (push, pull, carries) and lower body days (squat, hinge, core). This model lets you add slightly more volume per muscle group without extending session length, because you’re training fewer patterns per day. A simple week might be Monday upper, Wednesday lower, Friday upper, with weekend rest or optional cardio. Alternatively, Monday lower, Thursday upper if you only have two training days.
Upper/lower splits work best when you can train three to four days per week and want to spend 35 to 50 minutes per session. They also suit people who find full body sessions leave them too tired, or who want to add extra accessory exercises (a second push variation, a second pull) without rushing.
Example upper body session:
- Floor pushup: 3 × 10
- One arm dumbbell row: 3 × 10 per arm
- Band face pull: 2 × 15
- Farmer’s carry: 3 × 30 seconds
- Side plank: 2 × 20 seconds per side
Example lower body session:
- Goblet squat: 4 × 8
- Kettlebell swing or Romanian deadlift: 3 × 10
- Bulgarian split squat: 3 × 8 per leg
- Front plank with shoulder taps: 3 × 10 taps per side
Both models deliver results. Full body is simpler and better if your schedule is unpredictable, because any session you complete trains everything. Upper/lower gives you more exercise variety and slightly higher volume per muscle group, at the cost of needing consistent three to four day availability each week.
What about rest days? Always include at least one full rest day per week, preferably two if you’re training four days. Rest days don’t mean lying on the couch all day. A 20 minute walk, light stretching, or easy yoga all support recovery without interfering with strength adaptation. The key is to avoid training the same muscle groups on consecutive days. If you do upper Monday and lower Tuesday, you’re fine because the muscle groups differ. If you do full body Monday and Tuesday, you’re asking your muscles to grow while still repairing from yesterday, which slows progress and increases injury risk.
Nutrition and Recovery Basics: Protein, Sleep, and the 48 Hour Rule

Training is the stimulus. Recovery is where strength actually improves. If you program perfect workouts but ignore sleep, protein, and rest intervals, you’ll stall or regress.
Protein is the most important nutrition variable for beginners. Your muscles break down during training and rebuild stronger during recovery, but only if you supply enough amino acids. A simple, evidence based target is 0.7 to 1 gram of protein per pound of bodyweight per day. For a 150 pound person, that’s 105 to 150 grams daily, spread across three to four meals.
Protein sources include chicken, fish, lean beef, eggs, Greek yogurt, cottage cheese, tofu, lentils, and protein powder. You don’t need to obsess over timing. Eating protein at breakfast, lunch, and dinner, plus a post workout snack if you train fasted, covers most people’s needs. If you’re vegetarian or vegan, combine complementary plant proteins (rice and beans, hummus and whole grain, peanut butter and oats) to get all essential amino acids.
Protein becomes even more important if you’re in a calorie deficit trying to lose fat while building strength. Higher protein intake (closer to 1 gram per pound) helps preserve muscle when total calories are low. For most beginners who aren’t dieting, hitting 0.7 to 0.8 grams per pound is sufficient.
Sleep is non-negotiable. Growth hormone and testosterone (both critical for muscle repair and strength) peak during deep sleep. Chronic sleep deprivation (fewer than 6 hours per night) reduces strength gains by up to 30% in some studies and increases injury risk because your nervous system can’t coordinate movement as well when fatigued.
Aim for 7 to 9 hours per night. If that’s impossible due to work, kids, or life circumstances, protect sleep on the nights you can control. Keep your bedroom cool (65 to 68°F), dark, and quiet. Limit screen time 30 to 60 minutes before bed. If you must choose between an extra workout and an extra hour of sleep, choose sleep. Strength improves faster with three well rested sessions per week than with five sessions on five hours of sleep.
The 48 hour rule governs your training frequency. After a challenging strength session, the muscle groups you trained need roughly 48 hours to fully repair and adapt. Training the same muscles again before that window closes interrupts recovery and reduces your performance in the second session. For example, if you do a full body workout Monday, wait until Wednesday to repeat it. If you do upper body Monday, you can train lower body Tuesday because different muscles are working.
This rule doesn’t mean you sit idle for 48 hours. You can walk, stretch, do light cardio, or train a different body part. It just means you give each muscle group two days off before loading it hard again.
Hydration and micronutrients matter but are simpler. Drink water throughout the day (a basic target is half your bodyweight in ounces, so a 160 pound person drinks roughly 80 ounces). Eat a variety of colorful vegetables and fruits to cover vitamins and minerals. If your diet is consistently low in a specific nutrient (vitamin D, magnesium, iron), consider a basic multivitamin or targeted supplement, but whole foods should be your foundation.
Active recovery can speed repair. A 10 to 20 minute walk, easy cycling, or gentle yoga increases blood flow to sore muscles without adding training stress. Foam rolling, stretching, or massage won’t directly build strength but can reduce soreness and improve your readiness for the next session.
Recovery isn’t glamorous. It doesn’t generate social media content. But it determines whether your training drives progress or just accumulates fatigue. Treat sleep, protein, and the 48 hour rule as seriously as your workout program, and your strength will improve faster with less frustration.
Measuring Progress: Baseline Tests, Milestones, and When to Retest

You can’t manage what you don’t measure. Tracking your workouts week to week shows small improvements, but periodic baseline tests give you clear proof that your overall strength has increased and help you set realistic next goals.
Baseline tests are simple, repeatable performance benchmarks you record on Day 1 and retest every 4 to 8 weeks. Choose three to five tests that cover your key movement patterns.
Common beginner baseline tests:
- Max pushups in one set (standard floor pushups, elbows at 45 degrees, chest touches floor or fist, no rest). Record the number before form breaks.
- Max bodyweight squats in 60 seconds (full depth, thighs parallel or below, controlled tempo). Count total reps.
- Max plank hold time (front plank, straight line head to heels, stop when hips sag or shoulders shrug). Record seconds.
- Max inverted row reps (if you have a bar or table; body angled 45 degrees, chest touches bar). Record reps before form fails.
- One rep max hold for carries (farmer’s carry or suitcase carry with your available load; walk as far as possible without setting weight down). Record distance or time.
Perform each test after a 5 minute warm up, rest 3 to 5 minutes between tests, and record your results in your training log. These numbers are your baseline. They’re not good or bad. They’re simply your starting point.
Retest every 4 to 6 weeks. After a training block (4 to 6 weeks of consistent work using the same program), repeat your baseline tests under the same conditions (same warm up, same time of day, same environment). Compare new results to your baseline. Most beginners see 20 to 50% improvement in their first retest, especially on movements they’ve been training regularly.
Final Words
You’ve worked through a simple plan: set up a small home kit, follow safe progressions, and track tiny wins. The article gave workout templates, a weekly schedule, and straightforward ways to add weight or reps.
Stick with the basics—compound moves, consistent frequency, and small overload each week. Use the minimum-effective option on busy days so you keep the habit.
Make this home minimal-equipment strength progression for beginners your go-to. Keep going—small steps add up, and you’ll see real progress.
FAQ
Q: Do you want hyperlinks included?
A: You want to know whether hyperlinks should be included. Say “Yes” and paste the allowed links list, or say “No” and I’ll mark [Hyperlinks]= na and omit links from the outline.
Q: What format should allowed hyperlinks be in?
A: You want to know the required hyperlink format. Paste each full http(s) URL on its own line; adding a short label is fine. Avoid tracking parameters for cleaner use and review.
Q: What happens if I don’t provide a hyperlink list?
A: You want to know what happens if no link list is provided. I’ll proceed without links, mark [Hyperlinks]= na, and you can add links later for a quick revision if needed.
Q: How quickly will you generate the outline after I confirm?
A: You want to know how fast I’ll deliver the outline after your reply. I’ll produce the full outline in the same session—usually within a minute if your instructions and links are clear.
Q: Can the outline include external citations or sources?
A: You want to know if the outline can include citations. I can include direct links and source notes only if you supply allowed URLs; otherwise I’ll add general source suggestions without active links.
Q: What other details should I provide besides links?
A: You want to know what extra details help. Give target audience, desired word count, tone, must-have sections, and key points. These cut revision time and improve accuracy.
Q: What if I need edits after you send the outline?
A: You want to know the edit process after delivery. Specify exact changes—sections, tone, or link updates—and I’ll revise promptly, noting versions and keeping choices minimal.